Father’s Day Geek Projects

I’m not a geek by accident. I was raised a geek. My father was a geek and his father before him was a geek, only he wasn’t called a geek, because “geek” meant something different in his time that would land you in a side show.

I’ve been having a difficult time with a lot of different aspects of my world, lately. My father passed away unexpectedly in March. I owe most of who and what I am to him, especially the part with a terrible sense of humor.

He introduced me to the Geek Project. He was always using fun techniques to teach my siblings and me new concepts in a way that would help us remember them and hold our interest.

As an important side note, his ideas weren’t always the safest. He had a different concept of “safety” than the rest of the world. At one point he actually got prescription safety glasses and wore them every day from then on. Every time I called him for help on something, he’d start by telling me how he’d done it in the past, then conclude with, “But you probably shouldn’t do it that way. Saying it out loud, it doesn’t sound very safe.” (He read my article on the baby swing hack and advised me that our home would likely burn down until I asked him to explain the math behind his worries.)

This Father’s day will be one of extremely mixed emotions. It will be my first Father’s day as a father, and my first Father’s day without a father. I think this article will fit both topics.

These are three projects my dad did with me when I was very young. They’re changed slightly to make them easier and “safer.” (One originally called for getting tubes made of soda lime glass then cutting, melting and blowing them.) They’re still not all entirely safe. There’s only so much you can do when dealing with projects from the mind of a man who figured it was probably for the best if his eyes had safety glass in front of them at all times. So … You may not actually want to do them.

Let me re-emphasize: You’ll probably end up dead, blind, or both if you do these.

They’re also all cheap, which balances out safety concerns! They essentially use trash, which I’m always keen on. (Not really, I just enjoy looking for reasons to use ‘keen’ in a sentence because I think it’s a nifty word.)

They are: a Cartesian Diver, a Soda Can Flyer, and a Pinhole Eclispse Viewer.

Cartesian Diver

Cartesian Diver with a bonus shot of the Soda Can Flyer

  • Time: Five to ten minutes
  • Cost: Pretty much made out of garbage, so close to free
  • Most difficult part: Using a hot glue gun

Materials:

  • Pen cap (Biro/Bic/Any pen cap that has a dangly bit)
  • Anything to add weight to the dangly bit on the pen cap (paper clips, clay, other assorted trash)
  • Transparent water or soda bottle with cap
  • Glue gun glue
  • Water

Tools:

  • Hot glue gun

Oddly enough, I never got to do this in any school class, and never saw it on Mr. Wizard. (To be fair, my dad only showed us the Mr. Wizard’s World episodes from the 80’s. He never got us the Watch Mr. Wizard episodes from the 50’s.) My dad did this experiment/project with glass tubes made of flint glass. He used a propane torch for 90% of his projects, so he was always prepared for glass blowing. The major advantage of blowing a small bubble on one end of the glass tube while leaving the other end opened but slightly melted to smooth it is that it’s easier to draw faces on the bubble than on a pen cap.

Most pen caps have holes in the top of them, so this is what the glue gun is for: Seal off the holes in the top. This will keep the air to keep your diver buoyant.

Quick and simple: Fill the bottle with water, not quite to the top. Weigh down the pen cap, and leave it with just enough air in the top of it so that it is barely floating.  Screw the bottle’s cap on tightly. Squeeze and unsqueeze the bottle.

The cap should dive down to the bottom of the bottle when the water pressure increases, then rise back to the top when the pressure goes back down again. (Depending on the amount of air in the cap, you may have to squeeze harder.)

[Cartesian Diver video]

If you don’t want to bother with the pen cap, you can try ketchup packets or wooden match sticks with the tops cut off, but you’ll have to squeeze much harder.

Soda Can Flyer

  • Time: 5 to 10 minutes
  • Cost: Once again, garbage
  • Most difficult part: Using a rotary cutting wheel to cut a straight line

    Behold! Yes, you will bleed to death.

Materials:

  • Soda can

Tools:

  • Rotary tool (Dremel) with cutting wheel
  • Can opener
  • Safety glasses (this can be ignored if your every day glasses are OSHA approved safety glasses for whatever reason)

It’s a soda can that flies. You may know this under the commercial names of Toobee, X-Zylo, Turbo Tube, Dragon Ring, etc. I’m calling it a flyer because none of those companies call it a flyer. My dad showed me how to make these further back than at least one of those companies existed.

Maybe it’s just  my can opener, because I don’t remember any that could do this from when I was a kid, but the can opener takes the top off a soda can perfectly. It leaves no jagged edges like the ones that threatened to slice off my thumb as a child. Looking back, I’m probably lucky my dad didn’t just hand me a rusty sword and challenge me to how closely I could look at it while running at top speed.

If your can opener isn’t as cool as mine, you’ll have to do two things: 1) Be jealous, 2) Find your own way to get the top off.

Next, use your favorite rotary tool attachment to cut the can about 2 1/

2″ down. (For European/Red Bull sized cans you’ll want to cut around 5 1/2 cm down, but the narrow opening won’t let a lot of air through so they won’t work very well. For giant energy drink cans you’ll probably want to cut about 3″ down, and they may be a lot easier to throw.) Do your best to file the edges. Or not. Either way, you’re probably going to wind up like Mr. Dalton, my junior high school wood shop teacher, who had fewer fingers than I’ve had cars.

And throw! Outside. After lots of practice. How? Like a football. An American football. Throwing it over your head with both hands like a soccer ball won’t get you anything but laughed at. By me. If you’re having troubles, check out Toobees on YouTube. And follow them back to their home page and buy one there, so you won’t slice off your fingers like that guy in Mad Max catching the kid’s boomerang. (Man, that scene always gets a giggle out of me.)

[Soda Flyer video]

Or you can just make it with paper and tape: Fold down an edge of the paper with a thick seam over and over and over. Tape the two sides perpendicular to the folded edge together, so you have a tube with the top being extra thick. Throw. (Again, as the appropriate sports ball mentioned above.)

Pinhole Eclipse Viewer

  • Time: 10 to 15 minutes
  • Cost: Still garbage
  • Most difficult part: Finding a use for it (seriously, we’re talking cutting and taping)

Materials:

  • Soda can fridge pack, or other long box or cardboard tube (Why Diet Dr. Pepper? Because now Diet Dr. Pepper tastes more like regular Dr. Pepper. Now back off!)
  • Aluminum foil (or aluminium if aluminum is not available in your country) (Full disclosure: I like to use wrappers from Rolos, as it gives me an excuse to buy and eat Rolos.)
  • White paper
  • Masking Tape

Tools:

  • Scissors or precision hobby knife
  • Pin or needle

This is a box you can use to “safely” watch an eclipse. Truth be known, I don’t know how much I trust watching the reflection of the sun off of white paper, because white paper is nearly as pale as my skin, and I KNOW it can’t be safe to see the sun reflected off my back. Ask my wife.

The longer the tube, the larger the sun’s reflection will be. With the fridge pack, it’ll be about 1/8″, so be prepared to squint.

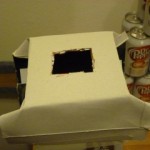
On one end of the box, cut a small square, smaller than your square of foil. Tape the foil over the square. Using the pin, poke a tiny hole into the foil. (My fridge pack box had some holes, so I used another box to matte out the holes. I could have just covered the whole end with foil instead.)

On the other end of the box, inside, tape a white sheet of paper. This will be the area on which the sun will be reflected.  On the side of the box near that end, cut a small view port.

That’s it. Face away from the sun, point the end of the box with the foil on it toward the sun. (Seriously, don’t look at the sun to line this up, what were you thinking, you knew better than that.) Look through the view port at the sheet of paper, and you’ll be able to watch the eclipse as it happens.

Now, this is an extremely lame project and you can only use it as often as there is a partial solar eclipse. It can, however, pull double duty as a pinhole camera if you re-cover the viewing port, get some photo paper to replace the white paper, and turn your bathroom into a make-shift dark room.
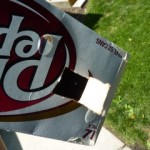
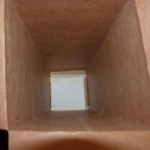
This is the paper at the end where the sun will reflect

This hole could be muuuuch smaller.

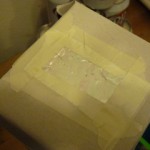
I could have gone smaller on the pin hole, too.

The top of the box gets aimed at the sun, and if you look closely you can see the sun reflected as a small white circle. Had this been during a partial eclipse, it would have looked more like a cookie that I'd eaten part of.


Baby Swing Hack

The baby swing hack is one of the first hardware hacks most new dads tackle. In fact, I first helped with the baby swing hack a decade ago, when a friend came up against the same problem with his new daughter.

The problem is batteries.  Manufacturer suggested retail price for a Fisher-Price Cradle n’ Swing ranges from $100 to $210, depending on features. Those that take only batteries start at $100, while those that also come with a power adapter (or place to plug one in) start at $140. The extra $40 is a lot to pay for a $10 power adapter. New batteries every other week would be even more expensive.

Hacking the baby swing to accept a power adapter is the low-cost solution. I’m not recommending anybody actually do this: I’m a bad parent, and this is just the way that I did it. While one of the easiest hacks I’ve ever done, please don’t do it without knowing your way around a soldering iron or without taking proper safety precautions. While this hack will allow someone to continue to choose either batteries or AC power, one should take out the batteries when using AC and not attempt to use both.

The first time I helped with the hack a decade ago, it was kind of a ThereIFixedIt solution. We literally soldered the AC adapter’s leads to the battery terminals, and it couldn’t be used any other way. (The father went back later and fixed it a little better, but I think the AC adapter was still permanently attached.)

This is a much more elegant solution … And also still a little kludge. The drawbacks:

  • I didn’t make it so that I could leave the batteries in while running it off of AC. Technically I could, but it would still drain the batteries, and it’d be a mess after the batteries ran out.
  • I wasn’t able to find a DC power jack and AC power adapter end that matched at Fry’s, and didn’t have the patience to order ones that would match. So I used a 3.5 mm microphone jack and plug. It works really well, but it might also get me laughed at.

Our swing is the Fisher-Price How Now Brown Cow Cradle n’ Swing (the 2-in-1, not the take-along swing). MSRP is $100, and you can probably find it for $90. We got ours as a dented box discount at the local Mattel Toy Store Outlet for $50 in perfect condition.  It takes 4 1.5V  D-cell batteries wired in serial, for 6V DC total power. One should use around 1.2 amps (1200 mA) for the power adapter, we settled on 1.8 (1800 mA) since that’s what they had in-store.  (Fisher-Price actually uses 700 mA adapters, but the 500 mA we first tried was massively under-powered.  An 800 mA adapter may do fine.)

We bought a universal power adapter for $15 (could have gotten it cheaper online), and a microphone jack and microphone plug-end for $0.89 each at Fry’s. So, here’s my project notes:

Baby Swing Hack

  • Time:  15 minutes
  • Cost:  $17
  • Most difficult part: Soldering wires, drilling holes

To determine if the hack would work, I wrapped a separate wire around each of the ends of the battery terminals. (Just the two at the ends of the battery chain.) You can see them here:

Hacked Baby Swing project: test leads connected

I carefully touched them to the ends of the power adapter (set to 6V DC), very careful not to cross them, and met with success.  I then unscrewed the back, and found this:

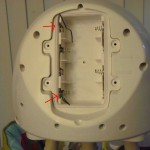
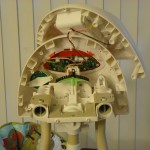
The insides of the baby swing. You can see on the upper right where the wires run to the batteries.

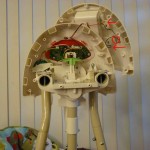
I probably should have gotten a few more pictures here, but it’s pretty straightforward.  I chose a place for the microphone jack that had plenty of electronics-free space behind it, drilled a hole, put the microphone jack in (the hole was so snug that I was able to just screw the jack in, and it was so tight a fit that it required pliers to do so), and soldered it in.  One trick here: Make sure you note which is the positive lead and which is the negative lead, and wire it correctly. I didn’t, so I had to wire the microphone plug onto the AC adapter backwards, too.  You can make out the microphone jack and the wires going to it in this picture:

I then clipped off the end of the AC adapter, soldered the microphone plug plug to it, and that’s it. I don’t have a picture of the AC adapter, but it looks as professional as the baby swing does.  Here’s the end result:

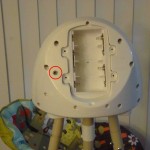
New power jack circled in red. Works perfectly, looks like it came that way.

The end product is a baby swing that has a power adapter (or can use batteries) for $67, instead of $140. If I’d ordered parts online, or found used parts, it would have been even cheaper. And the baby loves it. We’ll probably “hack” it a bit more, and securely put our own mobile at the top, as the one it comes with is fairly uninteresting … To me. Our child seems fascinated with it anyway.

How to cheat at knitting

I’m now adding Knitting alongside Guitar Playing and Balloon Animal Twisting for things I’ve learned for my son.

Technically, I learned how to knit about five years ago when I stole a knitting book and needles from my mother. (These have not been returned.  She can deal with it.) I got about a dozen rows into a sweater and decided that sweaters were a terrible first project, homespun yarn is a terrible first fiber, and the Xbox has a higher return-on-investment if my investment is only going to last for a few hours.

My opinion on the ROI was reversed, however, when my mother-in-law met her grandson.  She bestowed upon him two of the most gorgeous cardigan sweaters I’ve ever seen in my life.  Gorgeous hand-knit items aren’t really new to me, as literally everybody in my family besides me (before this month) either knits or crochets.  (My dad knits, my brother crochets, and my mother and two sisters do both, though I think they all prefer crochet.) For some reason, these sweaters were what inspired me to finally start creating.

Well, the sweaters and his mobile.  My sister crocheted an incredible mobile for my son.Crocheted by his Auntie Brenda I think I got jealous that he had such amazing hand-crafted gifts from both sides of his family, but nothing from his own mum and dad.

I picked up that same stolen knitting book and those same stolen needles, and started making a baby afghan.  It’s a little ribbed blanket with a simple pattern, and it’s going well … but taking a loooong time.

While I was looking for yarn to use at the Walmart, Gemma saw a Knifty Knitters round loom set. She asked me what it was and how it worked. When I described it to her, she excitedly told me that she’d had a small spool knitting loom as a child, and loved it. Apparently she’d been wanting to knit something for our son, too, but didn’t feel like she could develop the skill to pick up needles and create something.  (She’d gotten as far as casting onto a needle, then knitting one row four or five times before ripping and starting over, and over, and over.)

We bought the looms, and about three hours after we got them home, she’d already completed Devon’s first hat! In the meantime, I’d had about 10 days with his blanket, and it wasn’t even a foot long. Gah!

The next day, Gemma had completed a hat for herself, and was planning other projects. I felt like I was making no progress on my baby blanket, so I went to the store to buy some new yarn, once again stole knitting implements (this time one of her looms) and started a scarf.

It took 10 days, but it’s done and it’s fantastic and I don’t care if it’s cheating. I’ve found some techniques on the Internet and figure that I can get the time on these scarves (even at 8 to 9 feet long) down to three to five days.  Even with an infant, I have plenty of time to work on them while mummy is nursing our son.

I’ll have more pictures of the things I’ve created after Thanksgiving (which is when we’re celebrating half of our Christmas with my family in Utah), after I’ve given them to their intended recipients. The loom is FAST and easy.

Meanwhile, I continue the slow, plodding work on the baby blanket. I hope to be done with it by the time real Christmas rolls along. Although I’m happy with the work that the looms turn out, the items made with needles are the ones that are exciting me. I can’t wait until I’m done with all of the Christmas items, so I can turn my attention to knitting socks in the round using the Magic Loop technique, a new baby blanket for an expecting family member, and eventually sweaters for the whole family.  Just probably without homespun yarn.

Apparently somebody reads my blog

Just a quick update to my last post. The author of idphoto4you.com sent me an e-mail asking why I hadn’t used his site instead of ePassportPhoto.com. Well, I simply hadn’t tried it.

Now I have! I was going to mention it here and state all the reasons why I preferred ePassportPhoto.com instead … But I think I actually like idphoto4you.com more. A lot more.

  • In addition to cropping for you, idphoto4you.com will let you rotate the photo, too. Especially for an infant photo, this can be invaluable.  I don’t mean just 90-degree rotations, but if the baby’s head is drooping a bit to the left, you can fix that.
  • A major problem with ePassportPhoto is that once you’ve guessed at how big your crop will need to be, then you move that crop and position it over the face, and you can not change the size of the crop without starting over. With idphoto4you.com, you can move, resize crop, rotate, resize, move again, etc., in any order, allowing you to get things just right very quickly.
  • This is a minor detail, but the face guide that idphoto4you.com uses is easier to understand at a glance.

Some things are a bit better on ePassportPhoto, however.

  • ePassportPhoto has default templates for over sixty countries. Though most of these all have fairly common rules, it’s nice that you don’t have to look them up for yourself.
  • Passport photos are printed in a landscape aspect rather than portrait, so you get an extra picture. (Not that this makes any real difference, but it’s nice not to have wasted space. The extra photo can always be used in a project for grandparents.)
  • Links are included to have the pictures printed and mailed for you.

There are other minor differences that someone might have a preference for, such as idphoto4you.com allowing you to print bigger sheets with more photos, if you’d like. The bottom line for me, though, is that it took me about 10 seconds to get things just right with idphoto4you.com compared to about a minute with ePassportPhoto.

On a side note, how hilarious is it that somebody read this site and cared what was on it?

How to Get an Infant Passport: The Bad Parenting Way

With my son being multiracial (his mum is British and I’m from Idaho/Utah, so his races are White and Whiter) and having families on multiple continents, it was necessary for us to get his passport early.  He will be traveling to England for Christmas this year, and we wanted to make sure we could get his passport before we dropped money for three international plane tickets during the holiday season.

Getting a passport at all was actually in some degree of doubt. You see, his birth certificate is currently wrong. When I signed his birth certificate, I had only two hours of sleep after being awake for 27 hours, that sleep was in a very uncomfortable chair, and I’d gone to sleep with my hours-old son strapped to machines in the NICU and awoken to the news that his heart was on the wrong side of his chest. (The possibility that such a thing could be temporary was not relayed to me.) These are about half the excuses I use when I have to admit to what I did: I signed the birth certificate with my own birthday wrong. Worse, I noticed it was wrong when I signed it, but in my memory, I thought I’d alerted someone to the inaccuracy … but signed anyway. No matter. It was wrong.

Our first stop was by the Los Angeles County Department of Vital Records. On the day we noticed the error, they said if we got down to them that day before 3:00 PM, we’d be able to make the change the same day. We were there by noon, but it was apparently too late. They’d already sent the batch of birth certificates our son’s was in to the state department in Sacramento … about a week earlier. They’d looked up the wrong one when they told us we could change it that day.

Once a birth certificate goes to the state of California, it takes about 15 months to get it changed, and that’s not counting the new Furlough Fridays that state employees don’t work due to state legislature unable to pass a budget. So not only can’t we get it fixed by this Christmas, but possibly not by next Christmas, either.

We called the Passport Authority and spoke with Brian. If you’re lucky enough to speak with Brian at the Passport Authority, please call him four-letter words, curse his children’s children, describe lewd acts for him to perform with whatever demeaning objects you can think of, and hang up on him. You will be doing me a favor, having some fun yourself, and saving the universe from having to serve up the tiniest slice of Karma he deserves.

Brian “informed” us that it was absolutely impossible to get a passport if even one character on a birth certificate was inaccurate, and there was zero recourse. He informed me that in the history of the United States of America, there has never, ever been a passport granted with incorrect or incomplete information on a birth certificate. When I said that simply wasn’t true, that for centuries record keeping was notoriously bad and many people still alive had no earthly idea what year they were actually born in, and asked to speak with a supervisor, Brian hung up on me.  (He also shouted at one point that he was in charge, apparently of me from the context of the statement, and that I had to speak to him on his terms.)

After brainstorming for a bit over a week, my wife and I decided that the best way to get the passport with the least chance of it being rejected would be to get the passport face-to-face, where they’d have to look us in the eye and tell us that either they didn’t believe I was our son’s father, that they doubted the legitimacy of his U.S. citizenship, or that he was a citizen who was not entitled to a passport.

The hurdle here was that in order to go into the passport authority and get an expedited passport, you have to have proof that you’ll be flying in the next two weeks. Which meant getting tickets, which we didn’t want to do without knowing we’d get the passport. So after calling pretty much every airline, my wife was able to get reservations with Virgin Atlantic (we were very grateful and now have bought the actual tickets for Christmas from them) without a credit card, she got an appointment with the passport authority in L.A., and we were in.

So that’s already a fair bit of bad parenting, but this is where the infant-specific stuff comes in. Passport photos. The first question I had about an infant passport was, “What are the different requirements for an infant’s passport photos?” The answer is, “None.” Infants have all the same restrictions that adults have when taking passport photos, which include:

  • White or off-white background with no distracting shadows
  • Neutral expression with no smile or other emotion on face (such as crying), mouth closed, eyes open
  • Must look directly at the camera with both ears visible
  • 2-inch by 2-inch photo, with face 1-inch to 1-and-3/8-inches large, with the eye line between 1-and-1/8 to 1-and-3/8 inches from the bottom of the photo
  • No hands in photo

Now this last one seems so simple that it’s not even mentioned in most adult requirements … but try telling that to an infant who thinks the point of life is sucking on his fists.

With all these requirements for an infant, it seems impossible to get in a couple of shots. A low price for passport photos is about $14.  No way were we going to pay $14 a pop for what we thought would be a dozen shots to get an acceptable one.

It actually turned out to be 136 shots. (To be fair, there were four acceptable pictures out of those 136.) Thank goodness we found a better way.

My wife found epassportphoto to help us with taking our own photos, and turning them into acceptable photos. Basically, they help you crop the photo to the correct proportions, then they turn the cropped image into a photo sheet for you to get printed as a 4×6 photograph. We printed it at CVS for 19 cents.  (Side-note: They also do countries besides the U.S., completely free.)

After those 136 shots, here’s the final photo, the final sheet, and the Bad Parenting way to make it happen:

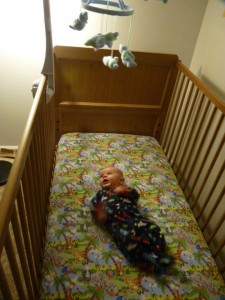
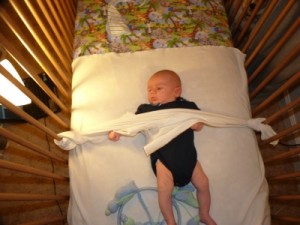
So, here you have the first secret: Tie the baby down. Yes, I’m a terrible person. I never claimed differently. I promise he was unharmed, and he wasn’t tied tightly. In fact, he was able to untie the left knot several times just by jiggling his arm a bit.

The white blanket on a crib should be obvious.

Next secret: Fill lighting. We had four lamps pointed at him from the sides. This on its own is not good enough, because they’ll all cast conflicting shadows (remember the shadow rule above). You need this fill lighting with the flash. The flash alone will leave very bad shadows.

Final tip: Plenty of help. We could have avoided the tie-down if we’d had two more people, one each to reach through the side of the crib to hold a hand. As it was, I was operating the camera, my wife was manning the lamps, and her father was shaking a rattle for him to look up at.

Even with all this, it still took over a hundred tries. Good luck.

As for the passport authority, everything went smoothly. They accepted his passport, they accepted our ID, and there wasn’t a single lie or half-truth uttered or written, except by Brian. We went in on a Friday, and picked up his passport after the weekend on the next working day. We needn’t have worried, everything would have worked fine by mail. On the bright side, though, we got the passport back weeks ahead of schedule, and were able to book his tickets earlier than we’d planned.

Screw you, Brian.

Balloon Animals: Because I hate my child.

I’ve got a Woot! related project that’s going on, but I don’t have time to finish up the paint on it right now.  My Beetlebot write-up is taking as long as the project itself did.

I’ll be talking instead about one more reason why I shouldn’t be a parent.

Talc has been linked to cancer and respiratory issues, which is why you won’t find much baby powder in many diaper bags anymore. Bits of thin, flexible rubber are an obvious choking hazard to all small children.  Contact with latex is the leading cause of latex allergy, followed by inhalation of small latex particles.

What do all these things have in common?  Balloons. (Minute amounts of talc coat the inside of balloons so they don’t stick together on the inside when you try to blow them up.)

In completely unrelated news, I’ve started learning how to make balloon animals the other day.  Either three or four days ago.

It’s insanely simple. I’m surprised it’s a fairly rarely practiced skill.

When I was rooting through the pack of balloon rejects I got at the dollar store for the Hover-Crap project I found a twisty balloon.  I thought it was pretty funny, so I blew it up, and twisted together the classic dog shape from what I remember them looking like.

It does take some practice, I suppose. I think some people might be put off because that practice takes specialized equipment like a balloon pump.  Thankfully, I finally found a use for years practicing trumpet and paying for private lessons: I can blow up even the really difficult ones by mouth. So no special equipment, just the balloons.

Speaking of twisty balloon pumps, I found one at a NEW dollar store in our neighborhood, the Dollar Dollars store.  As the name hints, it’s NOT actually a dollar store.  It’s faking.  It’s like the Family Dollar.  Everything in the store that costs 99 cents costs 99 cents.  Other items will cost other amounts.  As for the pump, it lasted for 0.05 balloons.  It got about 1/20 of the way in, and then stopped pumping.

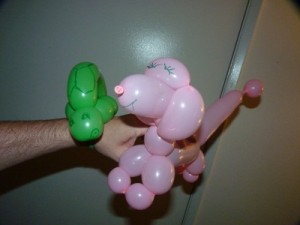
So in the last couple of days since the first dog, I’ve made a poodle and giraffe, which are pretty much dogs, a teddy bear, which is pretty much the dog, a turtle, which is a very, very small dog, an alien (two dogs and a water balloon), a couple of swords (half dogs), elephant (which is a large turtle, but still a small dog), and several different Tiggers.

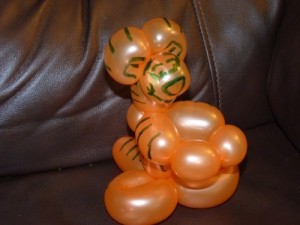
Don’t get me wrong, the Tiggers are also dogs, but they’re all different kinds of dogs.  The first one was a failed monkey, and the only one I have a picture of currently. I’m already moving on to “designing” my own animals/characters.  There’s more imagination in it than I thought, and it’s difficult not to be tempted to just look on the Internet to see how someone else made a character, but it’s pretty satisfying.  At first you could only tell my Tigger because of the face I drew on him. The most recent version looks a hekuva lot like Tigger without any Sharpie whatsoever.

The Internet thing should be making balloon twisting a skill that everybody has. You watch a video, you twist the shape, and then you go do it in the London Underground until you get chased away. I’d think that people who learned how to do this professionally (the second most exciting four hour course at Clown College) would be pretty angry that it’s completely demystified.

My plan is to pull this out whenever I’m forced to attend anything where my child is part of a group being led by another adult. This includes recitals, sports games, other kids birthday parties, and exceptionally well organized food fights.

(I will not be practicing this when my baby is still in the respiratory risk zone. I’m already well versed in tracking every scrap of popped balloon to keep our puppy from choking on them, because she will swallow them if I leave them behind. Not much I can do about potential latex allergies, but I won’t be letting my children sleep with them.  I recognize how fragile an infant’s ear drums are and the balloons will be absolutely nowhere near him until he’s quite a bit older.)

Quick note about our son: He’s due in one week.  Our doctor is threatening to induce our wife before her due date. We will be laughing at him. Regardless, our next two or three weeks will be hours of walking a day, feeding her all sorts of weird and spicy foods, oils and teas, giving her foot rubs, and, uh, special alone time.  All to get him introduced into the world in as natural (and non-painful) a way as possible. So this is why my projects are already slowing down in advance of his arrival.

Baby Names

So much for the Beetle Bot project.  Oh, I still plan on finishing it, but it keeps getting pushed back.  One-day-project my skinny white behind.

I did give it another go after I got proper motors, but my mounting solution for the motors failed miserably.  I have a solution ready to go, but just haven’t found the time.

Instead, I’ve been putting together furniture.  Two nightstands, a large dresser, a small dresser, attached a baby-changing station to the smaller dresser, removed the wooden frame from our bed, attached a metal frame, re-attached the metal frame after modifying the foot-board to accommodate the metal frame without being too wide (all this to lower the bed three or four inches to make the bed level with the baby’s co-sleeper and allow the dog to jump on the bed without worrying for ten minutes if she’ll be able to make it) … And I still have an end table and computer desk to put together, and we should really be purchasing a new TV stand.  And some more book shelves.  And we’re still waiting on the crib we want to become available.

As much as I hate IKEA right now, I have to grudge them some respect. Pretty much all of that fit in our tiny Chevy Aveo with room for the same amount again.  (The main reason we’re getting it all now is so that we can get it all home while there’s no baby seat in the car, so we don’t have to find a sitter to get a dresser.)

I’ve definitely lost the baby naming battle.  My wife will now take over all the naming duties, as I’ve been declared unreliable in this field.  Here is a (very small) partial list of names that have been vetoed:

  • Pwnz (my personal favorite, but I suspect it was vetoed because I initially submitted this name for the dog)
  • Razor
  • Rocker
  • Shadow
  • Blade
  • Westminster
  • Chopper
  • Thoreau
  • Sawyer (My high school buddy named one of his kids Finn.  How awesome would this be?)
  • Gemmo (pronounced Jem-Mo)
  • Kal El
  • Kirk

And a few broken down into categories:

Titles as first names:

  • Doctor
  • Mister
  • Professor
  • Major
  • Captain
  • Chief
  • President
  • Ambassador
  • Father

Middle names:

  • Danger (every guy since Austin Powers came out has tried to sneak this one in)
  • Trouble
  • Son-Of
  • Tiberius

Traditional names which should have been a lock:

  • Zebediah
  • Ezekiel
  • Judas
  • Brother of Jared (for any Mormon readers)
  • Thor

She even vetoed Thomas Christopher as the baby’s name.  This is half because a co-worker friend of mine recently named his son Thomas Christopher, and half because his initials would be TCB.  Which was the whole point, anyway.

Long story short-ish, I don’t get any say.  At least not for this child.  For the next baby, I’m hoping for a girl so I can try out Fluffypoo and Killer.