I’m not a geek by accident. I was raised a geek. My father was a geek and his father before him was a geek, only he wasn’t called a geek, because “geek” meant something different in his time that would land you in a side show.
I’ve been having a difficult time with a lot of different aspects of my world, lately. My father passed away unexpectedly in March. I owe most of who and what I am to him, especially the part with a terrible sense of humor.
He introduced me to the Geek Project. He was always using fun techniques to teach my siblings and me new concepts in a way that would help us remember them and hold our interest.
As an important side note, his ideas weren’t always the safest. He had a different concept of “safety” than the rest of the world. At one point he actually got prescription safety glasses and wore them every day from then on. Every time I called him for help on something, he’d start by telling me how he’d done it in the past, then conclude with, “But you probably shouldn’t do it that way. Saying it out loud, it doesn’t sound very safe.” (He read my article on the baby swing hack and advised me that our home would likely burn down until I asked him to explain the math behind his worries.)
This Father’s day will be one of extremely mixed emotions. It will be my first Father’s day as a father, and my first Father’s day without a father. I think this article will fit both topics.
These are three projects my dad did with me when I was very young. They’re changed slightly to make them easier and “safer.” (One originally called for getting tubes made of soda lime glass then cutting, melting and blowing them.) They’re still not all entirely safe. There’s only so much you can do when dealing with projects from the mind of a man who figured it was probably for the best if his eyes had safety glass in front of them at all times. So … You may not actually want to do them.
Let me re-emphasize: You’ll probably end up dead, blind, or both if you do these.
They’re also all cheap, which balances out safety concerns! They essentially use trash, which I’m always keen on. (Not really, I just enjoy looking for reasons to use ‘keen’ in a sentence because I think it’s a nifty word.)
They are: a Cartesian Diver, a Soda Can Flyer, and a Pinhole Eclispse Viewer.
- Time: Five to ten minutes
- Cost: Pretty much made out of garbage, so close to free
- Most difficult part: Using a hot glue gun
Materials:
- Pen cap (Biro/Bic/Any pen cap that has a dangly bit)
- Anything to add weight to the dangly bit on the pen cap (paper clips, clay, other assorted trash)
- Transparent water or soda bottle with cap
- Glue gun glue
- Water
Tools:
- Hot glue gun
Oddly enough, I never got to do this in any school class, and never saw it on Mr. Wizard. (To be fair, my dad only showed us the Mr. Wizard’s World episodes from the 80’s. He never got us the Watch Mr. Wizard episodes from the 50’s.) My dad did this experiment/project with glass tubes made of flint glass. He used a propane torch for 90% of his projects, so he was always prepared for glass blowing. The major advantage of blowing a small bubble on one end of the glass tube while leaving the other end opened but slightly melted to smooth it is that it’s easier to draw faces on the bubble than on a pen cap.
Most pen caps have holes in the top of them, so this is what the glue gun is for: Seal off the holes in the top. This will keep the air to keep your diver buoyant.
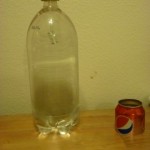
Quick and simple: Fill the bottle with water, not quite to the top. Weigh down the pen cap, and leave it with just enough air in the top of it so that it is barely floating. Screw the bottle’s cap on tightly. Squeeze and unsqueeze the bottle.
The cap should dive down to the bottom of the bottle when the water pressure increases, then rise back to the top when the pressure goes back down again. (Depending on the amount of air in the cap, you may have to squeeze harder.)
[Cartesian Diver video]
If you don’t want to bother with the pen cap, you can try ketchup packets or wooden match sticks with the tops cut off, but you’ll have to squeeze much harder.
- Time: 5 to 10 minutes
- Cost: Once again, garbage
- Most difficult part: Using a rotary cutting wheel to cut a straight line
Materials:
- Soda can
Tools:
- Rotary tool (Dremel) with cutting wheel
- Can opener
- Safety glasses (this can be ignored if your every day glasses are OSHA approved safety glasses for whatever reason)
It’s a soda can that flies. You may know this under the commercial names of Toobee, X-Zylo, Turbo Tube, Dragon Ring, etc. I’m calling it a flyer because none of those companies call it a flyer. My dad showed me how to make these further back than at least one of those companies existed.
Maybe it’s just my can opener, because I don’t remember any that could do this from when I was a kid, but the can opener takes the top off a soda can perfectly. It leaves no jagged edges like the ones that threatened to slice off my thumb as a child. Looking back, I’m probably lucky my dad didn’t just hand me a rusty sword and challenge me to how closely I could look at it while running at top speed.
If your can opener isn’t as cool as mine, you’ll have to do two things: 1) Be jealous, 2) Find your own way to get the top off.
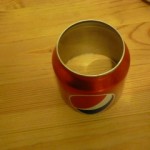
Next, use your favorite rotary tool attachment to cut the can about 2 1/
2″ down. (For European/Red Bull sized cans you’ll want to cut around 5 1/2 cm down, but the narrow opening won’t let a lot of air through so they won’t work very well. For giant energy drink cans you’ll probably want to cut about 3″ down, and they may be a lot easier to throw.) Do your best to file the edges. Or not. Either way, you’re probably going to wind up like Mr. Dalton, my junior high school wood shop teacher, who had fewer fingers than I’ve had cars.
And throw! Outside. After lots of practice. How? Like a football. An American football. Throwing it over your head with both hands like a soccer ball won’t get you anything but laughed at. By me. If you’re having troubles, check out Toobees on YouTube. And follow them back to their home page and buy one there, so you won’t slice off your fingers like that guy in Mad Max catching the kid’s boomerang. (Man, that scene always gets a giggle out of me.)
[Soda Flyer video]
Or you can just make it with paper and tape: Fold down an edge of the paper with a thick seam over and over and over. Tape the two sides perpendicular to the folded edge together, so you have a tube with the top being extra thick. Throw. (Again, as the appropriate sports ball mentioned above.)
- Time: 10 to 15 minutes
- Cost: Still garbage
- Most difficult part: Finding a use for it (seriously, we’re talking cutting and taping)
Materials:
- Soda can fridge pack, or other long box or cardboard tube (Why Diet Dr. Pepper? Because now Diet Dr. Pepper tastes more like regular Dr. Pepper. Now back off!)
- Aluminum foil (or aluminium if aluminum is not available in your country) (Full disclosure: I like to use wrappers from Rolos, as it gives me an excuse to buy and eat Rolos.)
- White paper
- Masking Tape
Tools:
- Scissors or precision hobby knife
- Pin or needle
This is a box you can use to “safely” watch an eclipse. Truth be known, I don’t know how much I trust watching the reflection of the sun off of white paper, because white paper is nearly as pale as my skin, and I KNOW it can’t be safe to see the sun reflected off my back. Ask my wife.
The longer the tube, the larger the sun’s reflection will be. With the fridge pack, it’ll be about 1/8″, so be prepared to squint.
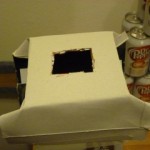
On one end of the box, cut a small square, smaller than your square of foil. Tape the foil over the square. Using the pin, poke a tiny hole into the foil. (My fridge pack box had some holes, so I used another box to matte out the holes. I could have just covered the whole end with foil instead.)
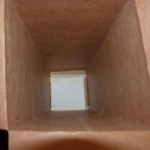
On the other end of the box, inside, tape a white sheet of paper. This will be the area on which the sun will be reflected. On the side of the box near that end, cut a small view port.
That’s it. Face away from the sun, point the end of the box with the foil on it toward the sun. (Seriously, don’t look at the sun to line this up, what were you thinking, you knew better than that.) Look through the view port at the sheet of paper, and you’ll be able to watch the eclipse as it happens.
Now, this is an extremely lame project and you can only use it as often as there is a partial solar eclipse. It can, however, pull double duty as a pinhole camera if you re-cover the viewing port, get some photo paper to replace the white paper, and turn your bathroom into a make-shift dark room.
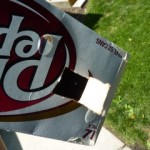
The top of the box gets aimed at the sun, and if you look closely you can see the sun reflected as a small white circle. Had this been during a partial eclipse, it would have looked more like a cookie that I'd eaten part of.

