For carving cool Jack-o-Lanterns, the instructions in any pumpkin-carving tool kit will do. The steps of taping the template, dotting the pattern with a toothpick or pin, and the actual cutting are pretty standard. About the only additional tip that I can add is to get a pumpkin-carving kit that includes a scoop/spoon (or use something like an ice cream scoop), because these are awesome for scraping the pumpkin walls to get them thin. The thinner, the better for more complex carvings. (Also, this is a very rare occasion for me not to recommend getting something at the dollar store. The pumpkin carving kits you get there have fat, wide pumpkin saws with sparse teeth, and they’re not very good. A better recommendation is to buy one of the nicer kits on the day after Halloween, when you can find them marked down even more than Halloween candy.)
To make your own template, though, you only need a few of things: A source picture that already has a pretty high contrast, any basic photo editing software that has brightness and contrast controls, and a bit of imagination/artistic enthusiasm … but not much.
This is the picture I chose for this year’s Batman template:
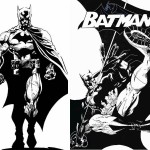
Batman pictures are generally good, anyway, because they typically have very high contrast and a lot of great shadows. If I’d looked for more than 12 seconds for a source picture, I would have found hundreds more to choose from. These were also contenders, and would have had the advantage that I could have skipped the photo-editing step:
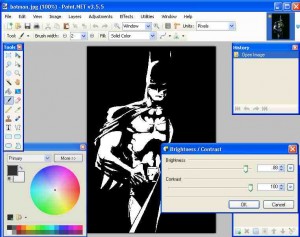
After choosing the source picture, open your favorite photo editing software (I like the free Paint.NET software) and play with the contrast and brightness settings. I normally crank the contrast to the very highest level, and then I play with the brightness in the 80% to 100% range. This is what I got out of my source picture:
What you’re looking for is a lot of connected black areas, with enough interesting white areas to be able to make out recognizable details.
With this particular template, this was as far as I actually ended up going. I didn’t need to do any more. I had to make some changes on the fly (like completing the bottom of the chest-symbol oval, connecting the dark area of the mouth to the rest of the dark area, etc.), but I just printed this off and went with it.
What I normally do, however, is print out this picture, place some tracing paper over it, and trace the template out. Along the way, I make sure that all dark areas are in some way connected. Any black areas that are not connected, obviously, will fall out when you carve the white areas around them.
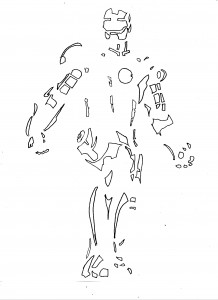
Here’s the Iron Man stencil I used the other year. I ended up only using the top half or so:
Anyway, that’s about it. I did the large Batman symbol freestyle at the end, and that’s why it suxx0rz, but it works well enough.
Remember to cut away the small, detailed, delicate parts first, and the big wide cut-aways last. Here are some of my past Jack O’Lanterns from my super hero series. Some are cut in real pumpkins, some are cut in foam pumpkins so I can keep them for a while. (When cutting foam pumpkins, use a very fast sawing motion with the pumpkin saws, and don’t push too hard.)


